Gno.Land: Localnet Walkthrough & First Realm On Ubuntu

If you missed the original gonzo adventure, the learning curve is captured here in all its confused glory. In this piece, I'm hoping to condense the key learning into a single place for future gnomes. Much of it will be a summary of what you can find in the GNO Example Demo. The awesome-gno repo is also obviously awesome.
What is Gno.Land?
Gnoland is part of the CosmosSDK world, and will go on to become Tendermint2. It's built around a proof-of-contribution consensus model I find wildly fascinating as someone drawn to the study & application of social capital. It's written in Gno, an interpreted version of Go, which is ♥.
Why Gno.Land?
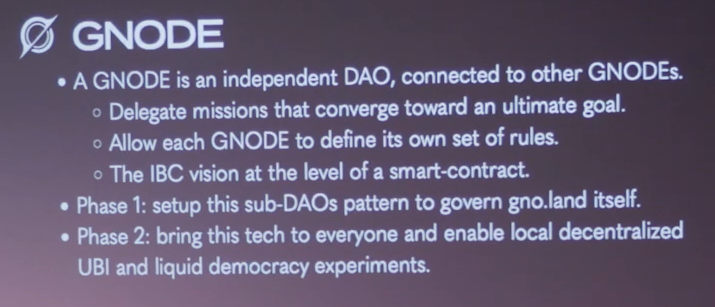
This slide captures the ethos/guiding ambition and is potentially one of the most consequential quests I've seen emerge in this space. Time and adoption will tell, but this kind of bottom-up model of self-governance as part of a federated whole is IMO exactly the kind of thing we need to be thinking through at this point in DLT's development cycle, and frankly the world's own socioeconomic trajectory. We have the tools and much of the know-how. We simply need to hack and expand until a network rooted in people-first social capital thrives (cough Commonwealth cough).
Key Terms/Info From The Gonzo Grind
As the Example Demo highlights, within the Gno.Land world a Realm is akin to a smart contract, while a Package is like a library. Realms are interacted with at the gno.land/r/<endpoint> while packages unsurprisingly map to gno.land/p/<endpoint>. I'm positive that endpoint is not the appropriate nomenclature, but it cuts to the chase of how you interact with them.
gnokey is a tool used for interacting with the chain (making/signing/broadcasting txs, adding/removing keys from the keybase, etc). gnokey account addresses follow the bech32 format.
gnodev is a tool allowing you to precompile/build/test realms and packages, as well as start the GnoVM REPL.
gnoland is the node itself. The local node should use --remote 127.0.0.1:26657 and --chainid dev. The local node will load genesis_balances.txt and genesis_txs.txt upon initialization, both of which can be manually manipulated to add accounts or make requests when you initialize your localnet. This can be reset with make reset.
You will need a user registered at r/users to interact with the boards realm (and any others that import the users realm).
./build/website spins up a web renderer for your node, like the one powering the gno.land site and testnet. Use it! It's a handy resource.
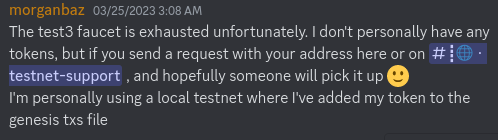
I've confirmed through Discord the test3 faucet is drained, which throws a "faucet failed" error. Hoping to scoop some test3 tokens from someone there, but in the meantime localnet and staging.gno.land it is.
Gno.Land Localnet Ubuntu Walkthrough
Installation & Account Setup
Potentially needed dependencies (if applicable):
# leveldb
sudo apt-get install libleveldb-dev

# rocksdb
sudo apt-get install -y libsnappy-dev
sudo apt-get install -y zlib1g-dev
sudo apt-get install -y libbz2-dev
Remove any unsupported Go version and install 1.19 (if applicable):
sudo rm -rf /usr/bin/go
sudo tar -C /usr/bin -xzf ~/downloads/go1.19.9.linux-amd64.tar.gz
echo "export PATH=$PATH:/usr/bin/go/bin" >> ~/.bashrc
Now clone the chain/test3 branch of the repo:
mkdir ~/gno
cd ~/gno
git clone -b chain/test3 https://github.com/gnolang/gno.git
Then make and install (more goodies in the Makefile):
cd ~/gno/gno
make
make install
Confirm both that gnokey is working and that there are no accounts with ./build/gnokey list. Interestingly, I seem to still have my previous keybase data which I didn't expect (note: investigate where stored).
Then generate your mnemonic seed phrase and add it to your keybase as follows. For KEYNAME, use whatever identifier you'd like to attach to this wallet seed. For this project, I just called mine local-test:
./build/gnokey generate
<mnemonic phrase, remember to backup>

./build/gnokey add KEYNAME --recover

Enter a passphrase to encrypt your key to disk:
<make a password>

Repeat the passphrase:
<repeat the password>

Enter your bip39 mnemonic
<enter mnemonic generated previously>
Now when you run ./build/gnokey list again you'll see something like the following:
0. local-test (local) - addr: g138j0um48nm4ppcz0tr6az4qu3yjwjl3l6ntqdx
Head over to gnoland/genesis/genesis_balances.txt, copy one of the preseeded accounts and append it to the bottom, replacing the address with the one you just generated.
You should now be able to spin up your node with ./build/gnoland, which if you haven't run it yet will initialize with your generated address preseeded with $GNOT. You'll want to do this in a separate terminal session. You can confirm this account is getting picked up by querying it with the following:
./build/gnokey query auth/accounts/g138j0um48nm4ppcz0tr6az4qu3yjwjl3l6ntqdx --remote 127.0.0.1:26657
If things are running successfully to this point, you should see a response like the following:
height:0
data: {
  "BaseAccount":{
    "address":"g138j0um48nm4ppcz0tr6az4qu3yjwjl3l6ntqdx",
    "coins":"10000000000ugnot",
    "public_key":null,
    "account_number":"53",
    "sequence":"0",
  }
}
If you instead see data:null, something has gone awry. You may have already spun up your node before editing the genesis_balances.txt file, which you can test by shutting down the node, running make reset, and then trying again. Worth noting is that you can also deploy a local faucet, which you can find instructions for in cmd/gnofaucet/README.md (more on this later).
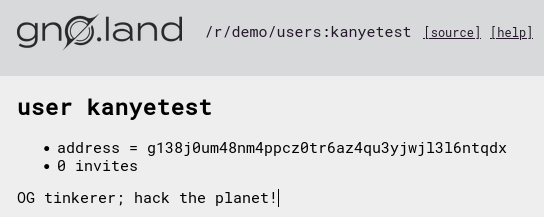
Now a critical step I missed in my "operation reckless abandon" is that once you've successfully pre-seeded your generated account, you'll need to register your account with the r/users realm with a tx to its Register function, otherwise you'll get an unauthorized error.
To do this you can use gnokey like you did to query, but instead to handle making and broadcasting the tx. Take note of the --send "200000000ugnot part, which is required by the Register function as the minimum payment. The args params are: inviter, username, profile in that order. inviter can be left empty.
./build/gnokey maketx call local-test --pkgpath "gno.land/r/demo/users" --func "Register" --args "" --args "kanyetest" --args "OG tinkerer; hack the planet!" --gas-fee "10000000ugnot" --gas-wanted "2000000" --send "200000000ugnot" --broadcast true --chainid dev --remote 127.0.0.1:26657
If successful, you'll see a response like this back. This same format is seen in any successful transaction made:
OK!
GAS WANTED: 2000000
GAS USED:   1327073
Also worth noting is that this is an insecure but quick method that handles making, signing, and broadcasting the transaction in a single command. This is the sequence taking place/preferred method:
### FULL SECURITY WITH AIRGAP ###

./build/gnokey query auth/accounts/ADDRESS --remote 127.0.0.1:26657

./build/gnokey maketx call ADDRESS --pkgpath "gno.land/r/users" --func "Register" --gas-fee 1000000ugnot --gas-wanted 2000000 --send "" --args "INVITER" --args "USERNAME" --args "PROFILE" > unsigned.tx

./build/gnokey sign ADDRESS --txpath unsigned.tx --chainid dev --number ACCOUNTNUMBER --sequence SEQUENCENUMBER > signed.tx

./build/gnokey broadcast signed.tx --remote 127.0.0.1:26657
If everything's gone to plan up to this point, you should now be able to spin up the web rendered with ./build/website, which you'll likely also want to spawn in a separate terminal session/background. Once it's running, head over to 127.0.0.1:8888/r/users where you'll find your account successfully registered. If true, you're at the point the Getting Started Guide will largely carry you from here (swapping test3.gno.land:36657 references for 127.0.0.1:26657 and --chainid test3 for --chainid dev).
Interacting With /r/boards Realm
First, you'll want to create the board. Worth noting it seems the BOARDNAME needs to match your registered username, which for my purposes is kanyetest. The following command provides the subsequent response:
./build/gnokey maketx call local-test --pkgpath "gno.land/r/demo/boards" --func "CreateBoard" --args "kanyetest" --gas-fee "1000000ugnot" --gas-wanted "10000000" --broadcast true --chainid dev --remote 127.0.0.1:26657

(2 gno.land/r/demo/boards.BoardID)
OK!
GAS WANTED: 10000000
GAS USED:   2306720
The following command reads the GetBoardIDFromName state taking in the username/boardname (same thing) as its parameter, and provides the subsequent response:
./build/gnokey query "vm/qeval" --data "gno.land/r/demo/boards
GetBoardIDFromName(\"kanyetest\")" --remote 127.0.0.1:26657

height: 0
data: (2 gno.land/r/demo/boards.BoardID)
(true bool)
Now you can create a post, and should get back the usual successful transaction response:
./build/gnokey maketx call local-test --pkgpath "gno.land/r/demo/boards" --func "CreateThread" --args 2 --args "Hello gno.land" --args\#file "./examples/gno.land/r/demo/boards/example_post.md" --gas-fee 1000000ugnot --gas-wanted 2000000 --broadcast true --chainid dev --remote 127.0.0.1:26657

OK!
GAS WANTED: 2000000
GAS USED:   906684
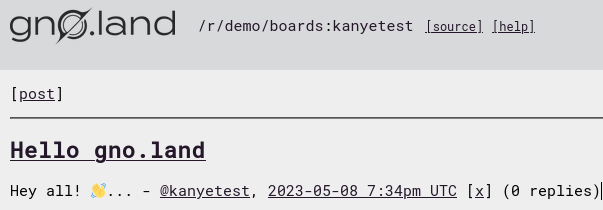
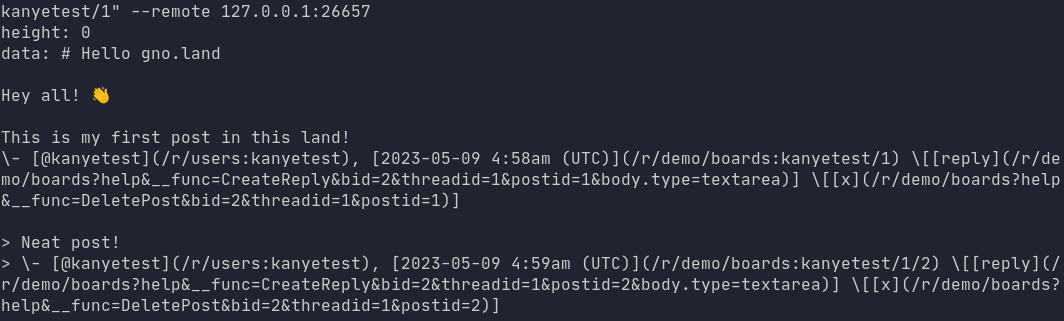
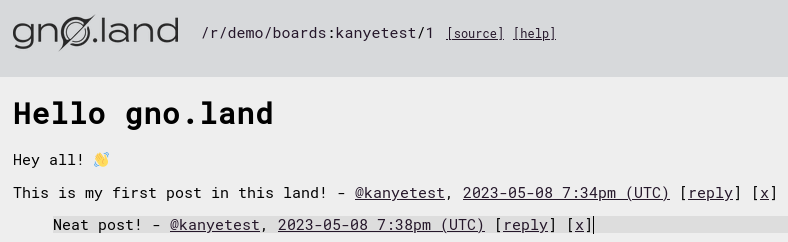
You should be able to see both the board and post in your browser, but can also query with GnoVM to leverage its query renderer:
./build/gnokey query "vm/qrender" --data "gno.land/r/demo/boards
kanyetest/1" --remote 127.0.0.1:26657

Finally, you can then reply to a post, which would be done with the following:
./build/gnokey maketx call local-test --pkgpath "gno.land/r/demo/boards" --func "CreateReply" --args "2" --args "1" --args "1" --args "Neat post!" --gas-fee 1000000ugnot --gas-wanted 2000000 --broadcast true --chainid dev --remote 127.0.0.1:26657

(2 gno.land/r/demo/boards.PostID)
OK!
GAS WANTED: 2000000
GAS USED:   962201
With the same call to the boards as above, the CLI renderer now includes the reply, as will the website renderer.
./build/gnokey query "vm/qrender" --data "gno.land/r/demo/boards
kanyetest/1" --remote 127.0.0.1:26657
And with that, you've now got through your first interactions with the boards realm on your localnet node.
Realm Development On Localnet
This has been fun, but all this is really doing is making queries and requests to an existing realm on your local machine, and where's the fun in that?
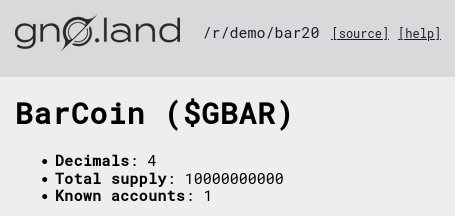
For this initial custom realm, I'm going to KISS. There's already a foo20 realm in examples, which implements the grc20 package found at p/demo/grc/grc20. From it, I simply copy foo20.gno and foo20_test.gno to their renamed bar counterparts in the new bar20 folder sibling to foo20. The .go files can be left behind because they'll be handled by gnodev.
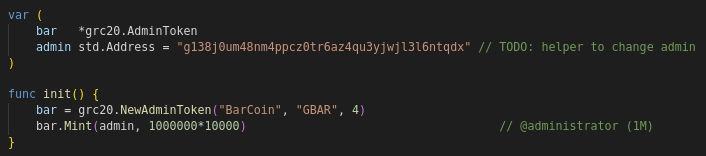
Now for this edited version, the only real change I'm going to make is changing the name/symbol, and scrapping the Mint call minting to a second account (because for now we have just the 1). Find/Replace foo with bar (case sensitive) in both files nets me what I want quickly. We'll also need to update the admin std.Address line to reference the address of your generated account. Now all that's left to do is to update the name to BarCoin and the symbol to GBAR because... why not? The Mint call to the admin var can be left, but the second call should be removed.
But wait... that's this 4 parameter? With a quick trip to p/grc/grc20/admin_token.gno we can see that's the decimals. For now I'll leave that to avoid some kind of BigInt conversion kind of issues attempting to change that to say 18 (NewAdminToken indeed has a FIXME comment saying to check for limits. Will experiment more later from main in case it changed).
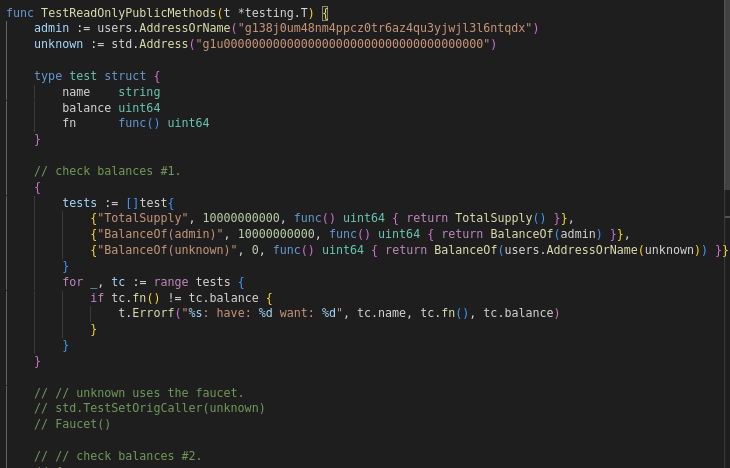
Next up the corresponding test file will need edits. The admin address will need to be updated to yours, and sorry @manfred... but GBAR is true monopoly money. Here we also see the Gnoland version of the zero address, called unknown, is g1u0000000000000000000000000000000000000.
In the tests array, the BalanceOf(manfred) call can be culled, and for now the Allowance(admin,manfred) line will also be removed for simplicity's sake, even though @manfred's address and that allowance check could both realistically both be left, since the address is part of the genesis_balances.txt file. The second test from the unknown caller I've commented out in its entirety to skip the Faucet call/supply change, while the first should have the values of TotalSupply and the expected BalanceOf admin edited to match.
With those changes out of the way, we'll need a fresh precompile/build to capture the changes in this realm. gnodev doesn't seem to get built with the make steps above so I build it with go build -o build/gnodev ./cmd/gnodev. Then running make examples.precompile and make examples.build will prepare your new realm for deployment. Under the hood these commands are running go run ./cmd/gnodev <cmd> ./examples --verbose
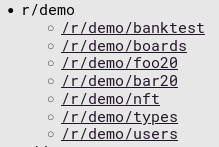
Now if you check the website renderer, you'll see r/demo/foo20 exists, but no bar20. This is where the addpkg command that eluded me in the previous writeup comes into play. To add the realm to your node, use the following:
./build/gnokey maketx addpkg local-test --pkgpath "gno.land/r/demo/bar20" --pkgdir "examples/gno.land/r/demo/bar20" --deposit 200000000ugnot --gas-fee 1000000ugnot --gas-wanted 2000000 --broadcast true --chainid dev --remote 127.0.0.1:26657

OK!
GAS WANTED: 2000000
GAS USED:   924852
Now I still don't see it represented in the website renderer, even after restarting both it and the node, but if you hop into gnoland/website/HOME.md (AstroJS's MDX perhaps someday too?), it's easy to spot why. After manually editing the list and restarting the website renderer the link is on the index, $GBAR is now monopoly money, and after running ./build/gnodev test examples/gno.land/r/demo/bar20 I've confirmed the the test passes. Excellent.

Ontology of a Gnoland Realm
The grc20 implementation makes for a good place to dig into how you might approach developing your own realms from scratch. It leverages the igrc20 interface found in p/grc/grc20 as implemented by admin_token in the same dir. It also demonstrates how functions are defined in a Gno file/contract using a familiar spec at the realm level, and how leveraging the beautifully clean syntax of Go makes it simple to define your state in a way that ensures interfaces are properly implemented.
A Note On Upgradeability
I noticed that upgradeability/versioning seems to be an ongoing discussion. Seeing only GRC 20/721/777 implementations, I was already having alarm bells go off that upgrades might not be a solved thing yet. In which case one pet project of mine, given my love of ERC2535 is what started this blog, is going to be exploring leveraging its simplicity within the gno.land space. Being an absolute noob in the CosmosSDK world I'm not sure how much/little will make sense or be portable, but if nothing else it'll help me learn more about the GnoVM. For EVM contracts, I really do believe it should be the standard pattern for any new projects not already committed to older upgradability specs, so helping port/adapt it to gno.land and starting with clean/simple upgrades would be awesome :)
Wrap Up & Next Steps
If you're still reading and have followed along without unexpected errors to this point, you've now:
installed gno.land and its dependencies
generated a new account and added it to your
genesis_balances.txtfileregistered a user with the
r/usersrealmcreated a board in the
r/boardsrealmcreated a post and reply in your board
modified an existing
grc20asset to be your own monopoly moneyexplored the
igrc20interface, implementation and realm Gno codecompiled, tested, deployed and rendered it from your localnet node
Next up I'm undecided to be honest... I've had too many ideas as I rambled through this. For now, I nap. And then, I hack.


